
It’s still amazing to me that I managed to finish an actual game for the first time. A lot of my success with The Lost Card I owe to the Tiled editor. I wanted to write a little blog post to explain all the ways in which I was able to leverage it to make this game work.
Tiled is a really cool app that can be used for a lot of things, but especially level building. In its basic form, you can import a tileset (a set of images all jammed together) and paint those tiles on a grid in layers.
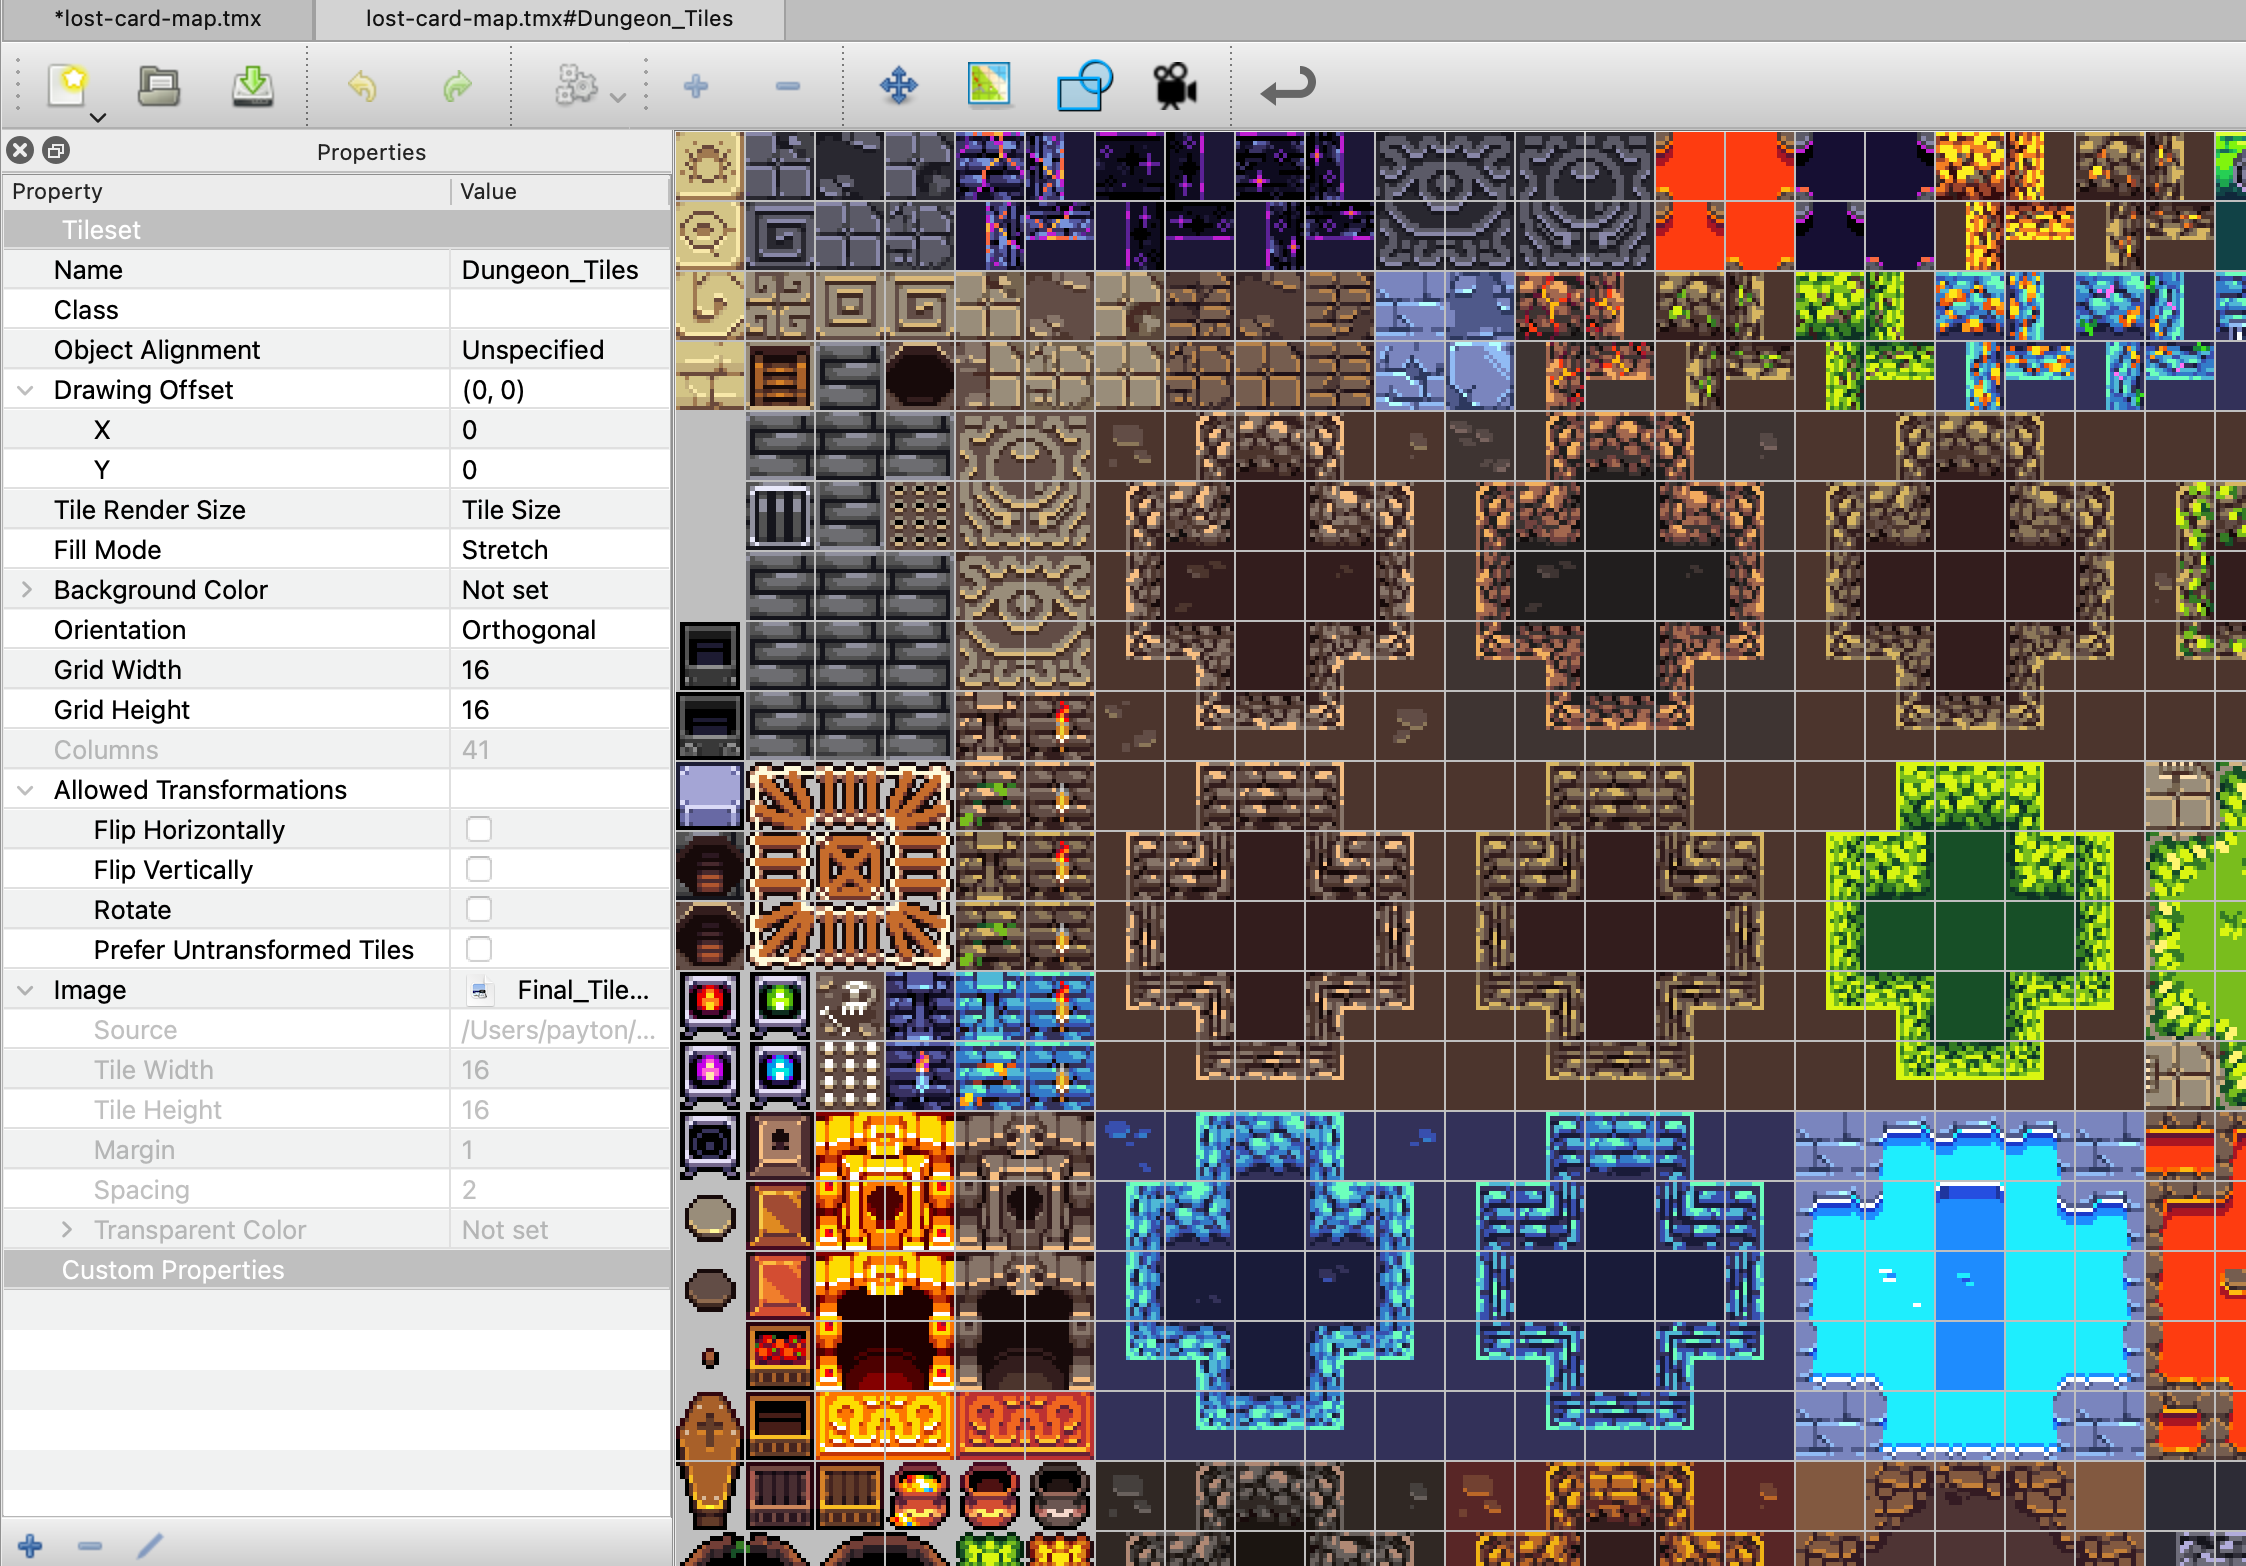
The resulting map can be exported as a data file rather than an image. This data is read by a game framework like Phaser to draw the level in game (some instructions for doing that). But there’s a lot more to Tiled than that.
Tile properties
For one thing, every tile can have properties assigned to it. The most common property is one which decides if a tile will collide with other objects in the game. These can be defined at a global level so when you paint tiles that represent walls, you can’t walk through them and when you paint a floor, you can walk over it.
It’s also possible to define arbitrary properties that can do anything you want.
For example, in my game, I labeled some tiles as water, which allowed them to be frozen by the player’s ice power. This also allowed me to have enemies behave in specific ways on specific tiles. Some water monsters are allowed to walk on water tiles, even though the player normally cannot.
Object layers
In addition to painted tile layers, the editor lets you define “object layers”. “Objects” in Tiled can be images, but they can also be invisible rectangles, or just points on the map. Where tiles can only be painted and erased, objects can be moved and interacted with independently. Since every object can have arbitrary properties, this allows for encoding a great deal of information right inside the map.
In my game, I used objects to represent the placement of the player’s starting location, the location of every monster in the game, every sign post, the doors, every power up item, and even the boundaries of each room in the dungeon.

Properties on each object along with what layer they’re in lets the game know what it should do with those objects.
One of the more complex objects I made was falling rocks. Each one is an image that has a collection of special properties to define how the rock will appear on the screen. One property defines how close the player has to be to the rock position until it begins to fall and another defines how fast it falls.
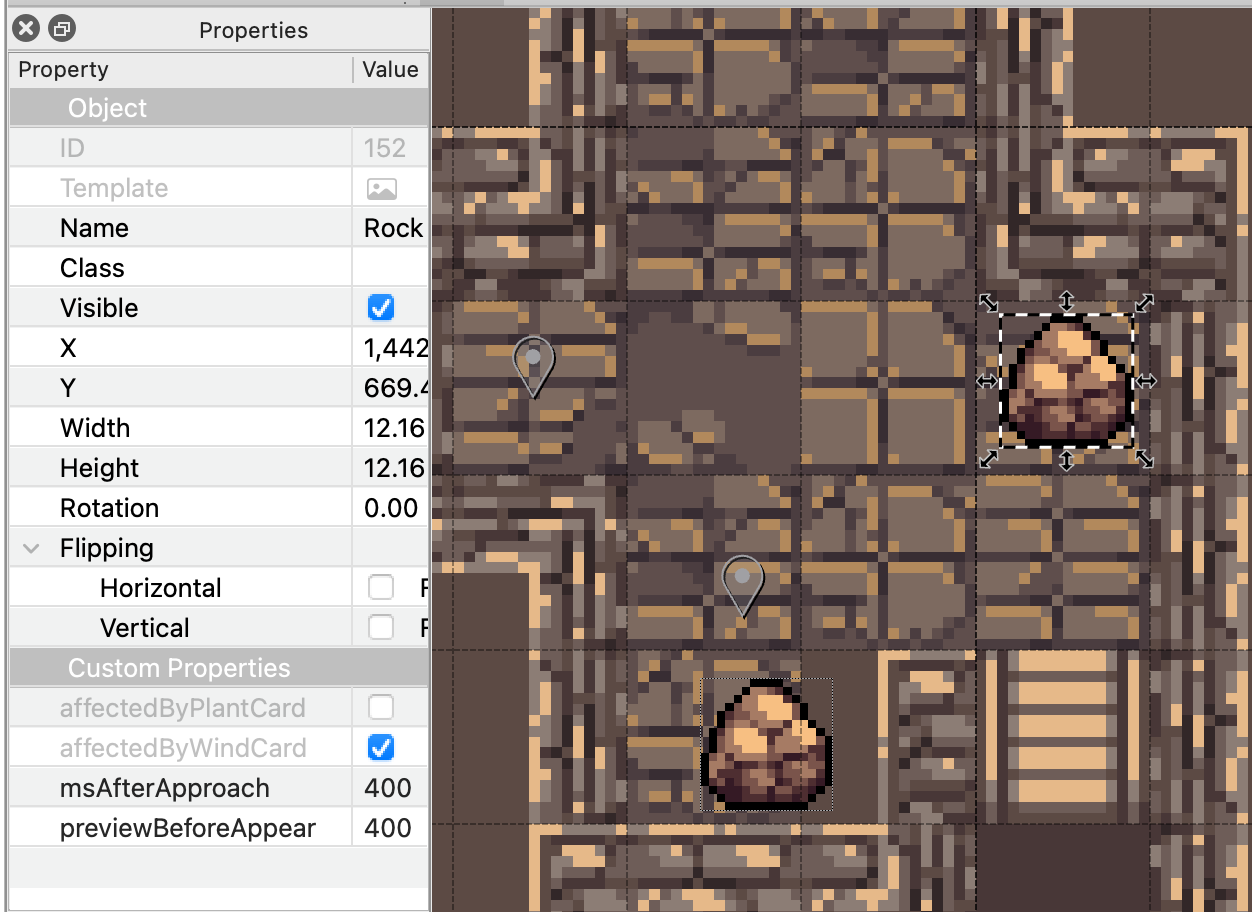
Other objects have a property that tells the game if an object can be affected by one of the special powers in the game. So, if an object is marked as being affected by the wind power, then the game will allow your wind power to push it. If an object is marked as being affected by the fire power, then the fire power will destroy it.
A lot of my development time was figuring out how to notice these special properties and make the game treat their objects in a particular way.
Doors
Making doors between rooms was one of the first and most complex tasks I had to do with Tiled. The way it works is that each door is an object that looks like a door facing in the appropriate direction. It’s important that there are no colliding tiles under the door so that the player can walk through it. Doors have two properties: doordirection and doorto.
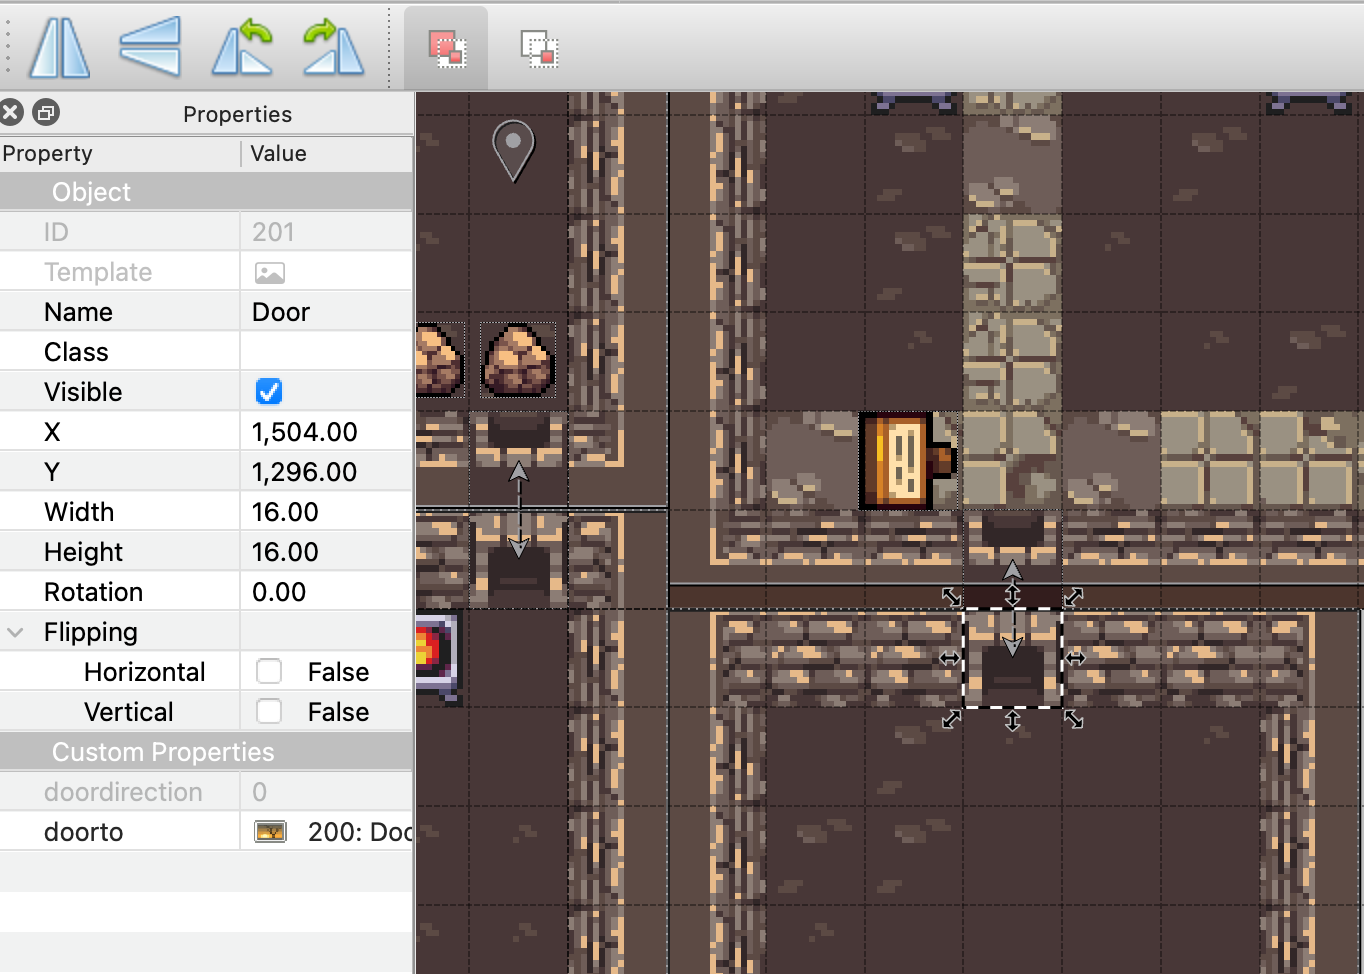
doordirection is an integer which represents which way the door is facing. You’ll see why I needed this in a moment.
doorto is something special in Tiled: a reference to another object. Specifically, I used this feature to tell the game where the door should teleport the player.
Wait: teleport? Let me explain.
Early on I realized that doors in a dungeon map are actually teleporters in disguise. When a player walks off the left side of the map, the room vanishes and is replaced by a different room with the player on the right of the screen. It’s a totally different place! How did they get there? They were teleported to the corresponding door and the camera moved to the room that contained that door.
There are other ways I could have implemented doors, but by treating them as teleporters I was able to do some cool things like have doors that don’t look like doors. Some rooms in my game are connected by ladders that sit in the middle of a room.
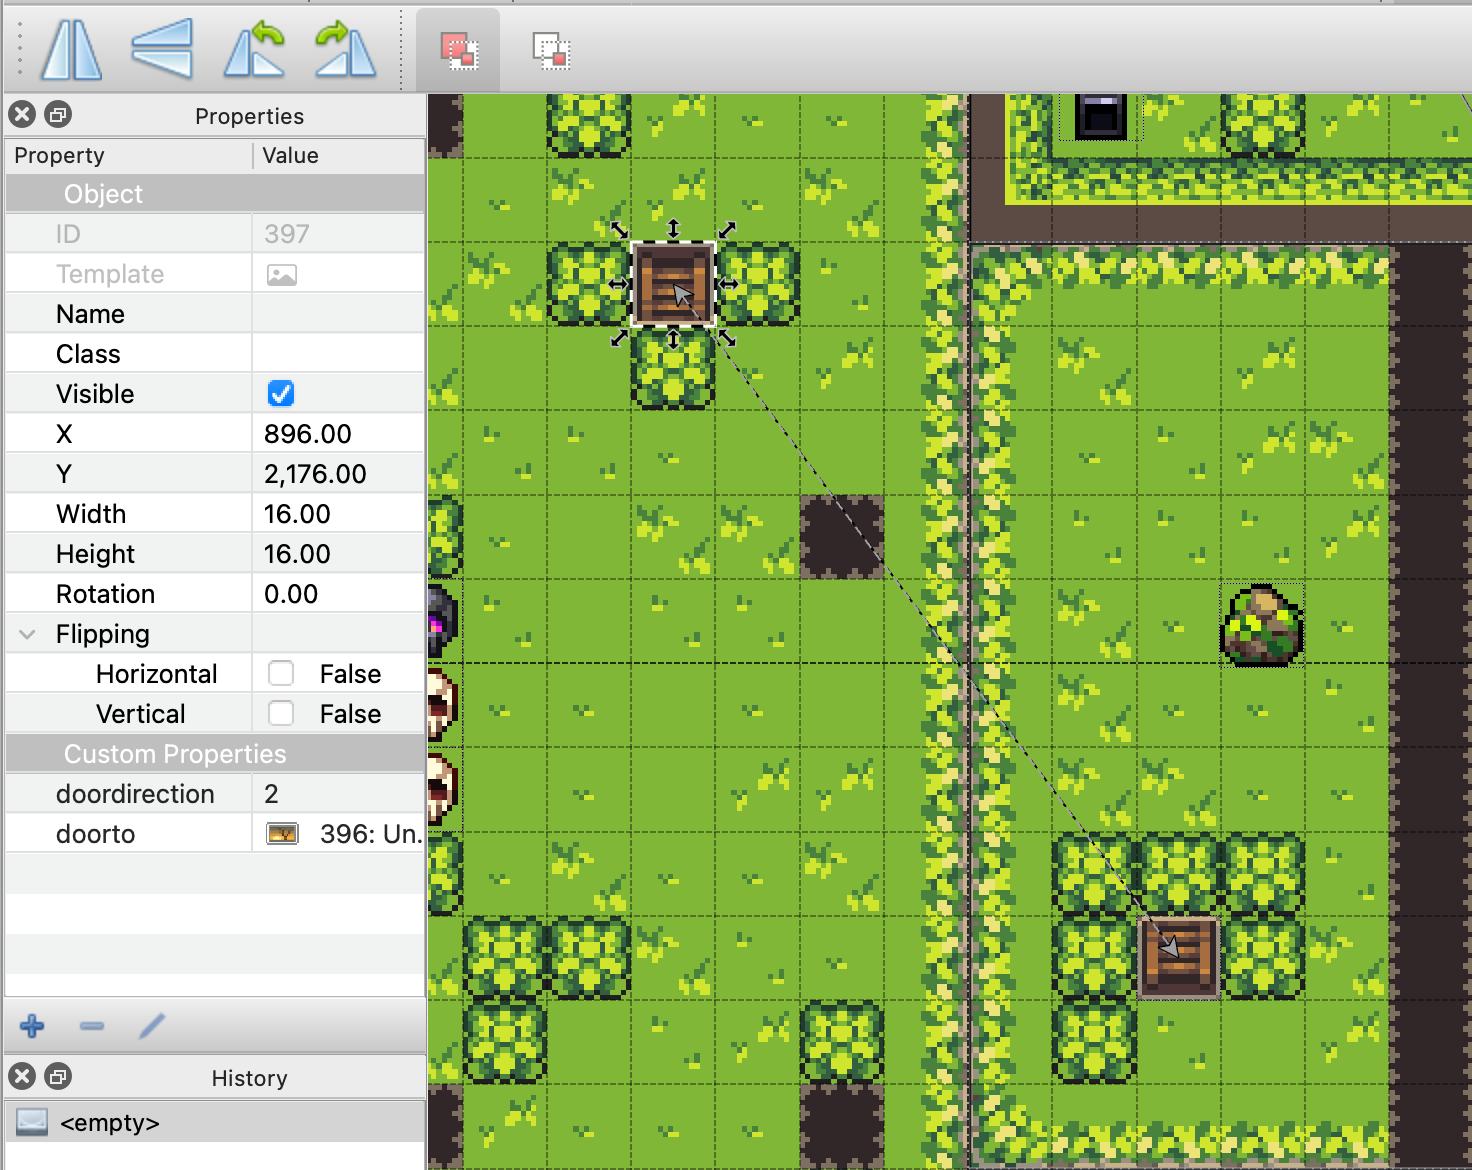
One caveat is that if you are teleported to the corresponding door tile then you’d be immediately teleported back and forth forever. So instead I teleport the player a handful of pixels in front of the corresponding door. But how do we know which direction to move the player in reference to the door? We need to know which way the door image is facing, which is encoded in the door tile as doordirection.
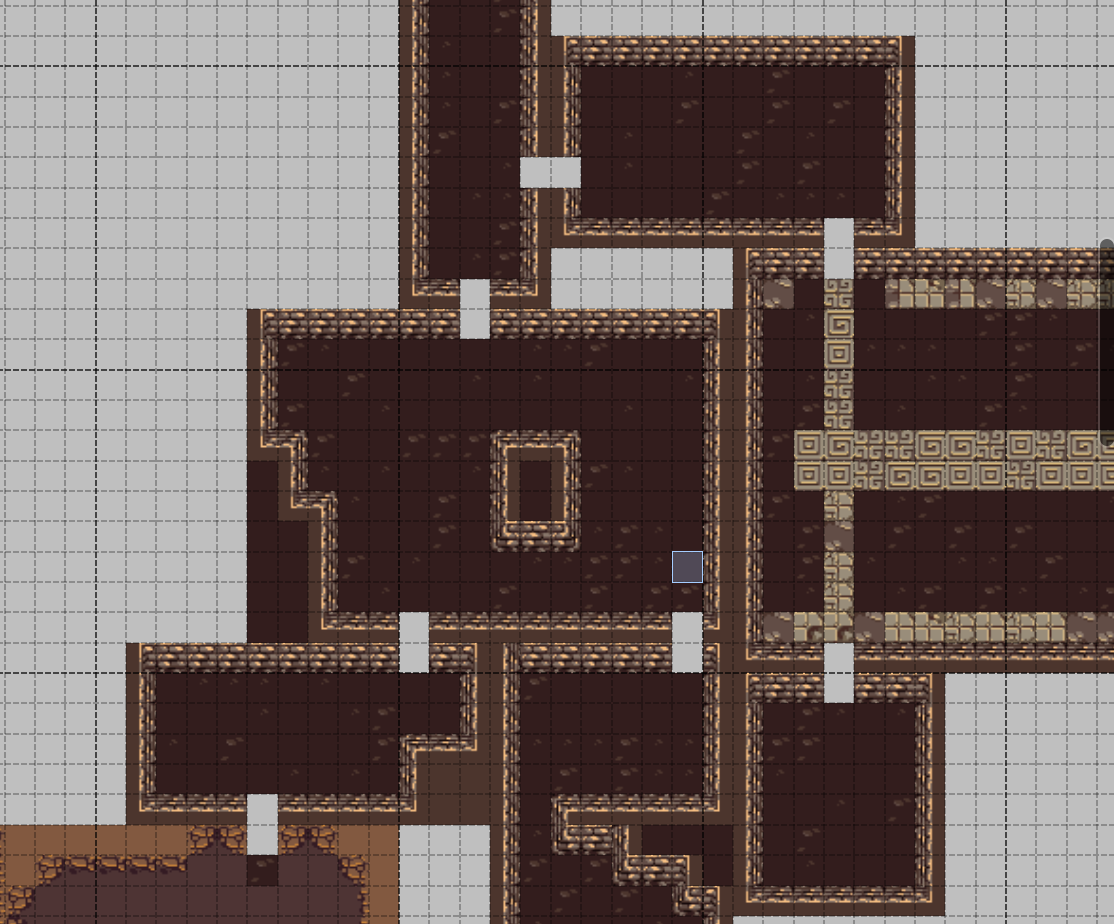
Rooms
In The Lost Card the player is only shown the room that they are currently in. Doing this took me a few tries to get right.
The most important thing was knowing where the boundaries of each room are. It’s easy for me to look at the map and see where one room ends and another begins, but I can’t think of a way to easily automate that process. Therefore I used rectangles in an object layer to define the borders of each room and give each room a unique name.
With that in place, I was able to call physics.world.setBounds() which defines the edges of what is drawn to the screen. When combined with making the camera follow the player and making the tiles in all other rooms invisible, this made the current room and its contents the only thing on the screen.
The room’s name also had other advantages since I was able to use it as a way to differentiate whole regions of the map, respawn enemies, and change the currently playing background music.
Creating sprites from objects
Rendering tile layers to the game world is pretty easy in Phaser. You make a “Tilemap” from the data exported from Tiled, then import the images used for each tileset. However, it’s not so easy to use images added in object layers.
The objects themselves (their name, position, and size) are simple to access from the tilemap, but if they reference an image, we need to tell the game to create a sprite in the object’s location with the object’s properties attached.
This isn’t that hard to do with custom code for each image but if you want the game to support adding arbitrary sprites taken from the map, there needs to be a way to automate the process.
Phaser includes a function called createFromObjects which does exactly this. But it’s not simple to use.
It’s designed to operate on a single type of image. If you want createFromObjects to work with any image in any tileset, you have to jump through some complex hoops.
When
useTilesetistrue(the default), Tile Objects will inherit the texture and any tile properties from the tileset, and the local tile ID will be used as the texture frame. For the frame selection to work you need to load the tileset texture as a spritesheet so its frame names match the local tile IDs.
In my case this meant that I had to load the tileset I was using twice using two different names and have it duplicated in Tiled also. In addition, the ID of each object is lost when it’s transformed into a sprite, which makes it impossible to use for code where the object ID is important, like my doors.
To get around these limitations, I made my own custom version of createFromObjects which uses callbacks to allow the caller to decide which tileset to use for each object and what to do with the object ID. I may try to contribute these features back to Tiled as a PR.
Tiled can do a lot
For a free program, Tiled is intuitive and amazingly powerful. It can do a lot more things than I’ve described here. I highly recommend checking it out.

Leave a comment